Scavenging from your awesome neighbors? Well, it’s a thing! I can’t begin to tell you how many awesome things my partner and I have been gifted from our neighbors or just got “lucky” and their trash became our new treasures.
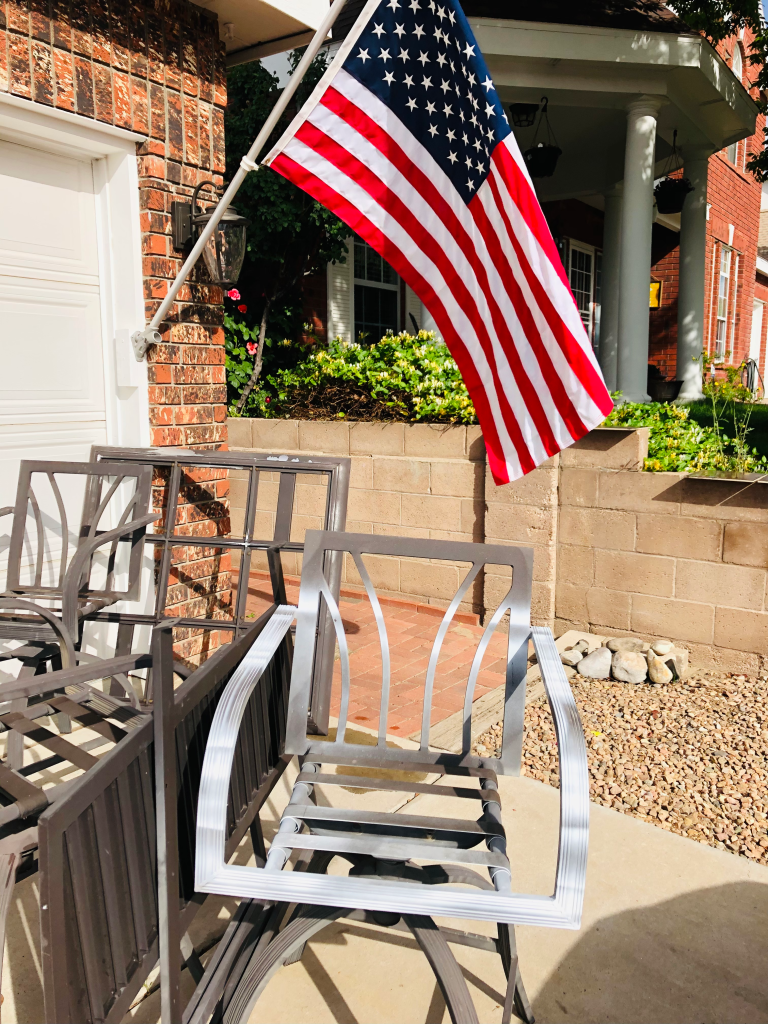
A few weeks ago, a neighbor remodeled the outside of their home to include their backyard. They requested a “large trash pick-up” from the local waste facility and placed the items curb side. We were up early and outside beautifying our front yard when we noticed these beauties!
SQUIRREL! Of course we had to ask the neighbor about the items and after he explained, we asked if he wouldn’t mind us taking some of his curb side pickup (Always ask, you don’t want to be a bad neighbor). Long story short, we landed ourselves a new treasure… however, you have to put a little elbow grease into things like this, sometimes you have to be able to see what things can be, not just what they are currently.
If you happen to find yourself in a similar situation, I have a few tips to help you out. Here is how we made this magic happen:
- Power washer/ Garden hose on Jet setting
- Sand paper
- Metal spray paint (Your choice of color- We used Rust-Oleum Oil Rubbed Bronze)
- Drop cloth
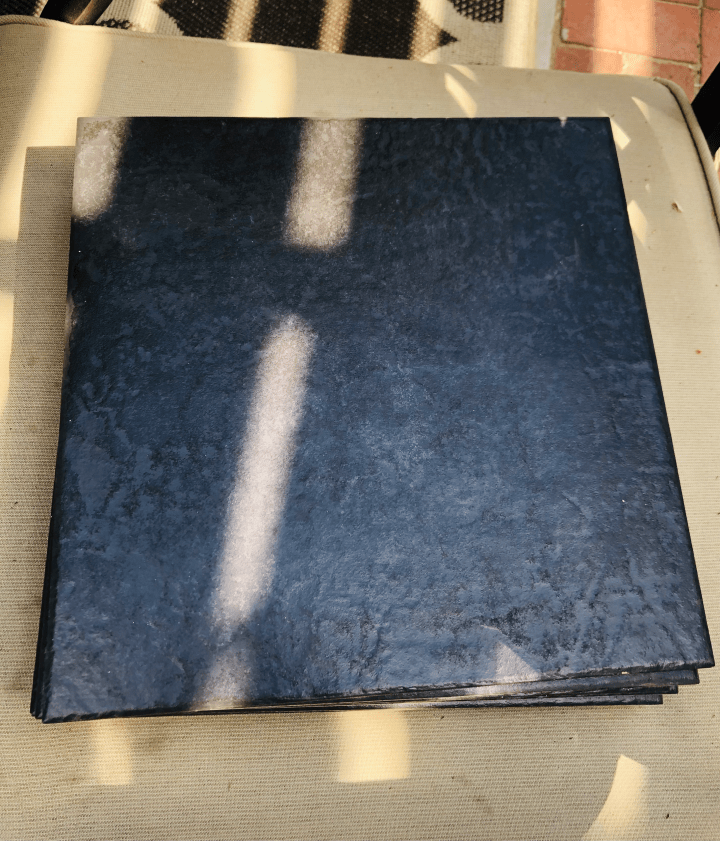
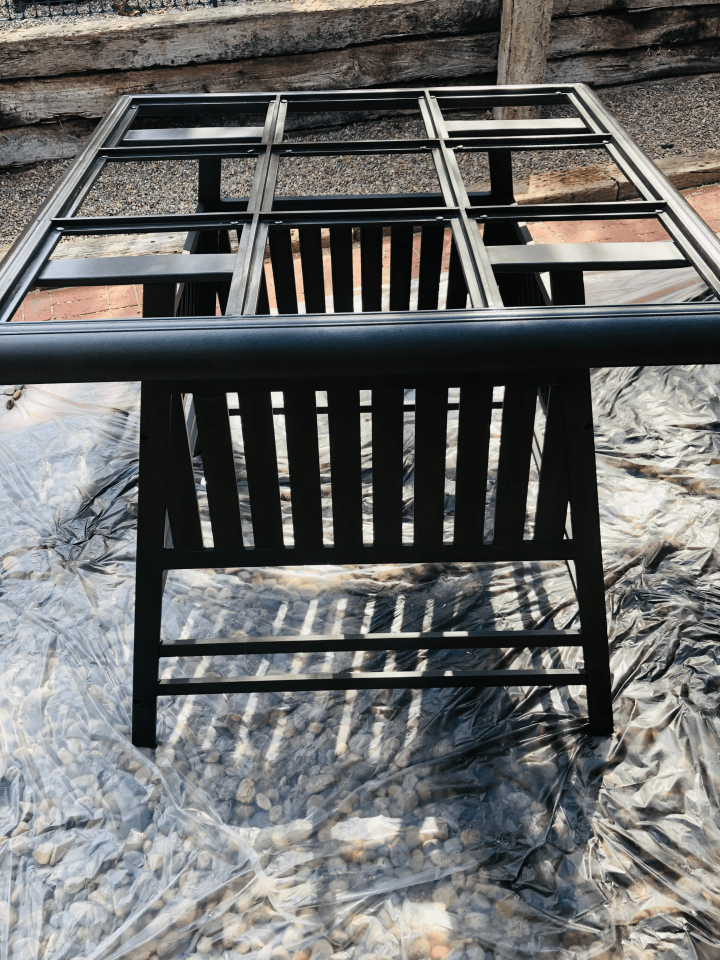
Step 1: The first thing you want to do is clean the items. We used our power washer to clean these pieces. As you can see, some of the chairs were covered in over-spray from a painting project the neighbor had completed, so it was important to inspect everything really well to ensure everything was very clean. Some things wouldn’t come off, so use used a little sand paper (Nothing too gritty) to gently sand off the unknown. This table also has a porcelain tile top, so we had to carefully clean each tile by hand. After we completed this step, we let them thoroughly dry in the sun.
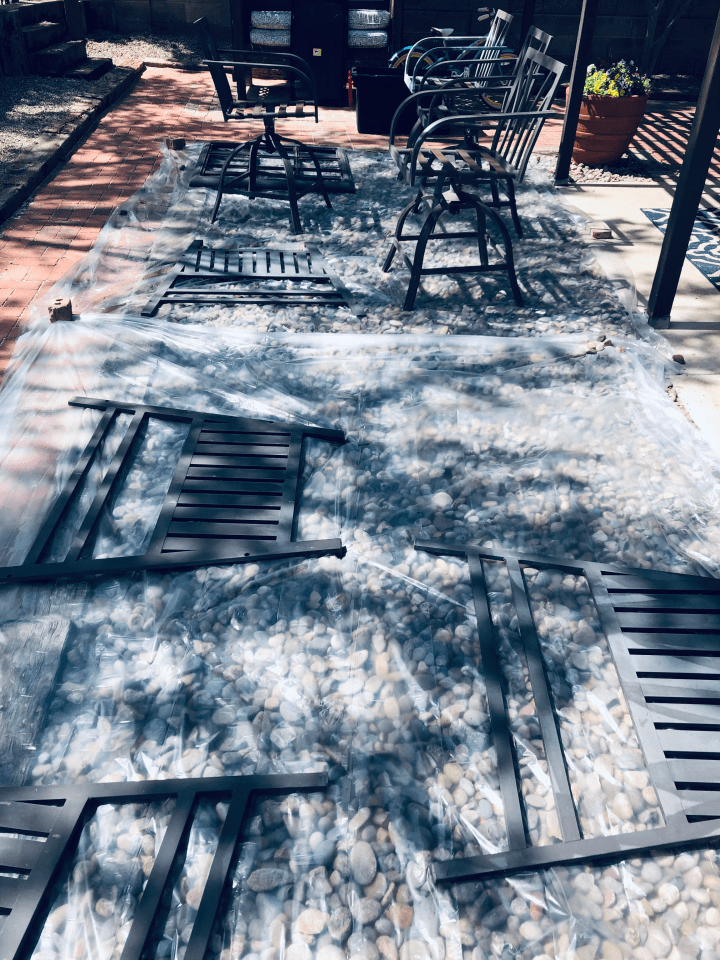
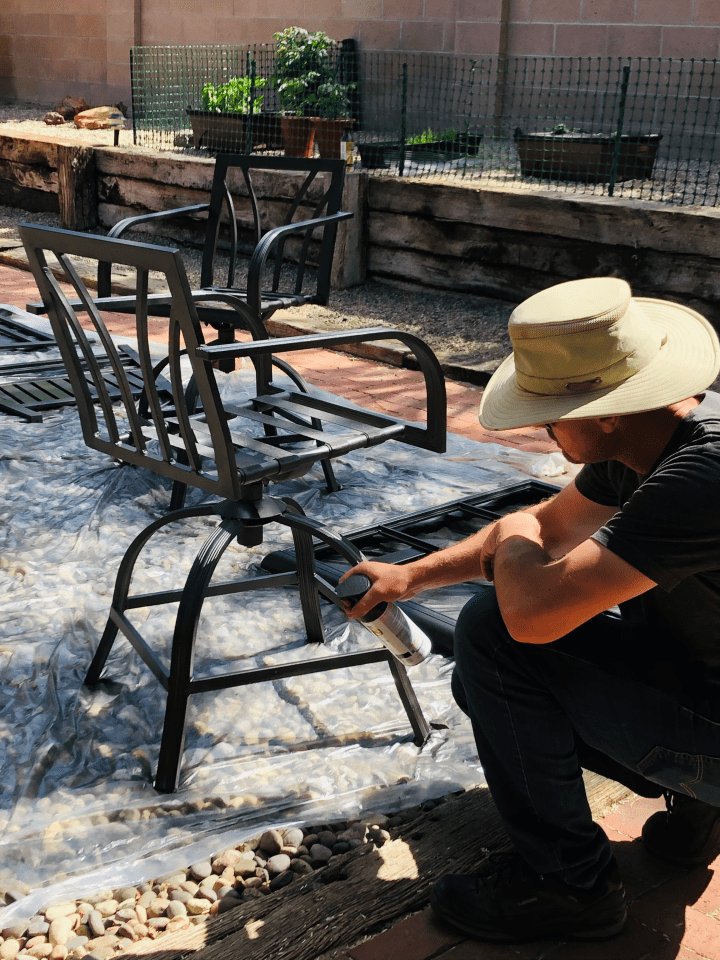
Step 2: Painting! I always recommend using a drop cloth of some type. Locally, we have a hardware store that offers free tie down rope and plastic for wrapping when you are taking big items home, so I usually grab a little extra plastic wrap to use as drop cloths. You can also purchase drop cloths at your local hardware store if you do not already have one.
Place the drop cloth out in your work area and make sure that you secure the ends. As you can see, I used bricks and large rocks. Where I live, the weather changes every ten minutes, so I wanted to make sure that the plastic drop cloth didn’t blow up onto our freshly painted treasure. That can ruin your paint finish and cause extra work.
After you have your drop cloth secured, place the items you wish to paint on the drop cloth, leaving room to maneuver around the items (You’ll thank me later).
Using even strokes of spray paint, complete at least two coats of paint for full coverage and protection. Let everything thoroughly dry according to the directions on the paint you chose.
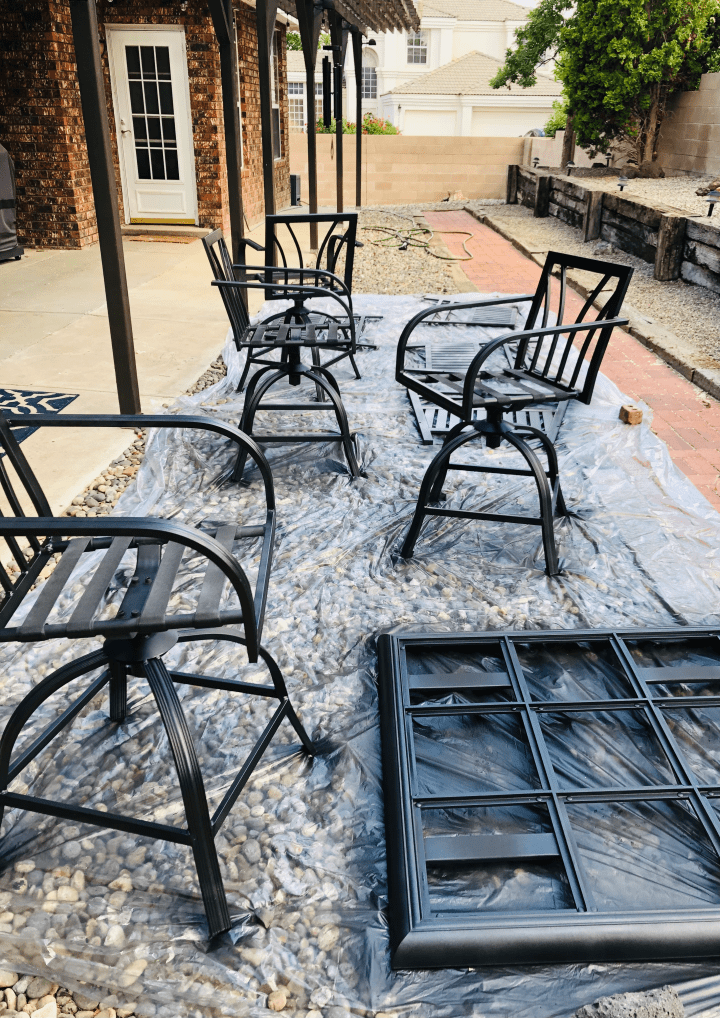
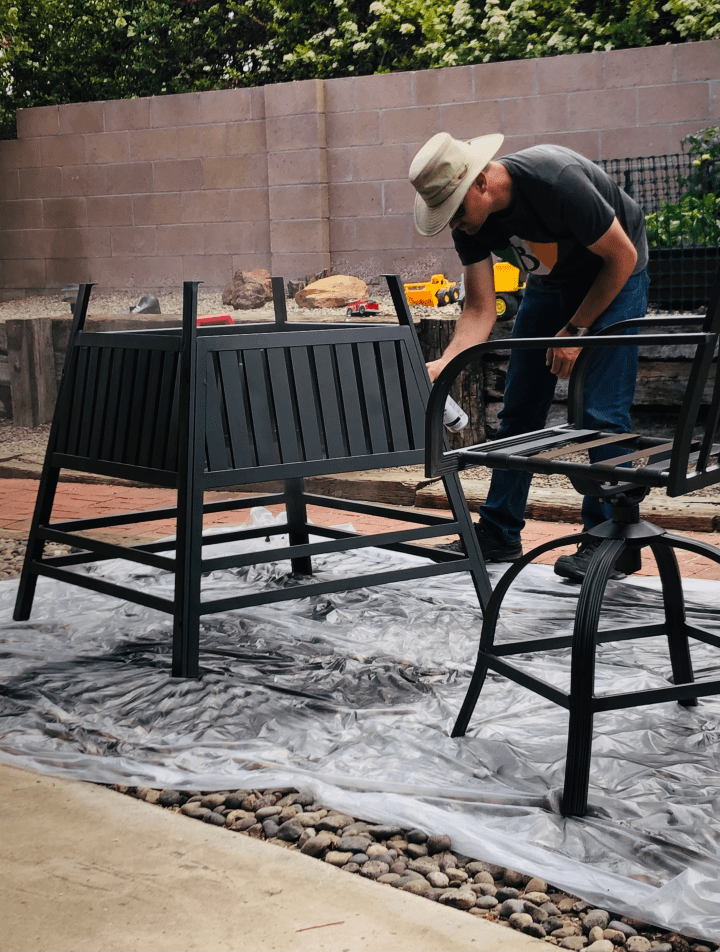
Step 3: Assembly! This is an exciting step! Unfortunately, our free treasure didn’t come with hardware, so on our trio to the hardware store, we purchased enough to complete our project.
We carefully assembled our newly acquired table and chairs to ensure we didn’t scratch them. This can be tricky if you are not exactly sure how everything goes together.
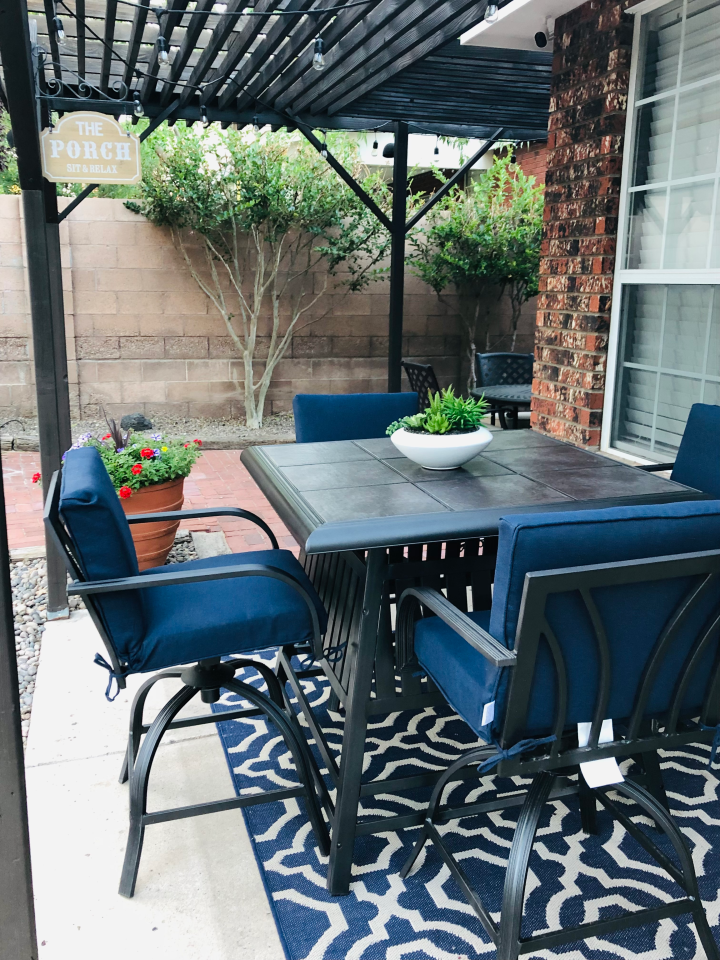
Overall, this was a successful, fun project! The total cost was less than $200.00 to rejuvenate and bring life back to our new outdoor table and chairs. Keep in mind that half of the cost was new cushions. It looks brand new, we have a new seating area in our backyard and it helped keep a few items out of the landfill.
The one thing to remember is that you need to keep an open mind, be creative and remember the big picture!
Happy scavenging!