
About six months ago, I fell in love with the farmhouse look for my house! I loved the clean look of the antique white base and stained dark wood table tops. It felt so welcoming and offered a classic, fresh look! I decided to purchase a large dining table, and it was beautiful… perfect for dinner with my boys and it allowed us plenty of room for dinner parties, homework, projects etc.
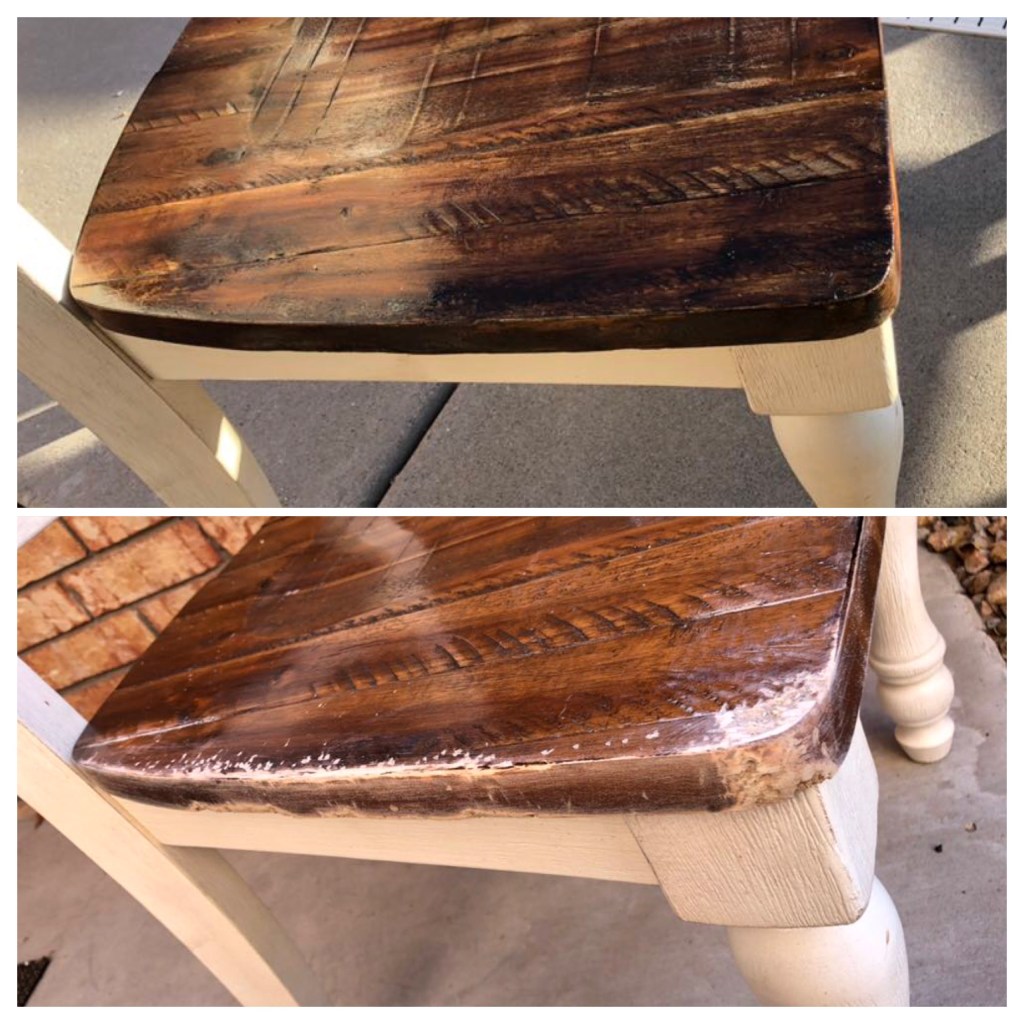
Fast-forward a few weeks later… I finally broke down and allowed my boys to get a puppy! This was a hard decision, we all decided that we would give it a try and see how we would adjust to a puppy! Well… his name was Blu and he was a Weimaraner! A few months later, we quickly learned that Blu loved to chew wood… He didn’t eat our shoes, clothes or the usual puppy things… just wood! With that being said, you can only imagine what happened to those new beautiful chairs! You guess it! Every chair was “nibbled” on… the front corners were all chewed…It was terrible! Not only because they were new chairs, but it was uncomfortable if your legs brushed against it! Ouch!
After hearing my boys complain everytime they sat down at the table or hear a random, “OUCH!”… I knew I had to do something with the chairs, especially since Blu had grown out of his wood chewing stage! I started to research my options… Could I fix the chairs? Pay someone to refinish them? Buy a new table? After all, this one was still brand new!
SQUIRREL!
I decided that I could take on the project myself and I couldn’t be happier with the results! It was easy, quick and a great mini project! I had refinished all of the cabinets in my home about a year prior, so this was not my first experience with these materials, but the outcome was significant!
Things you will need:
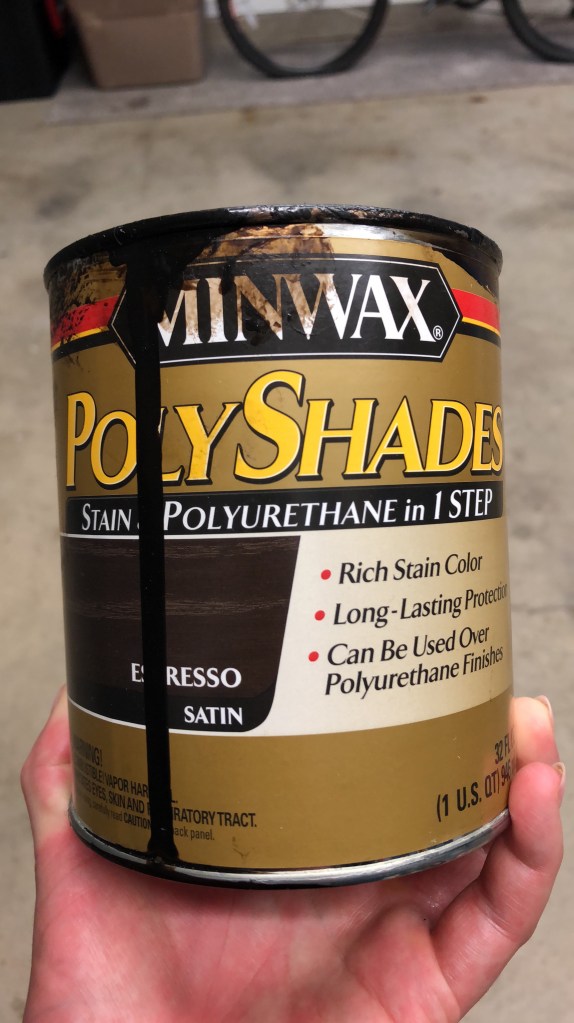
- Stain of your choice (I recommend that it already has polyurethane)
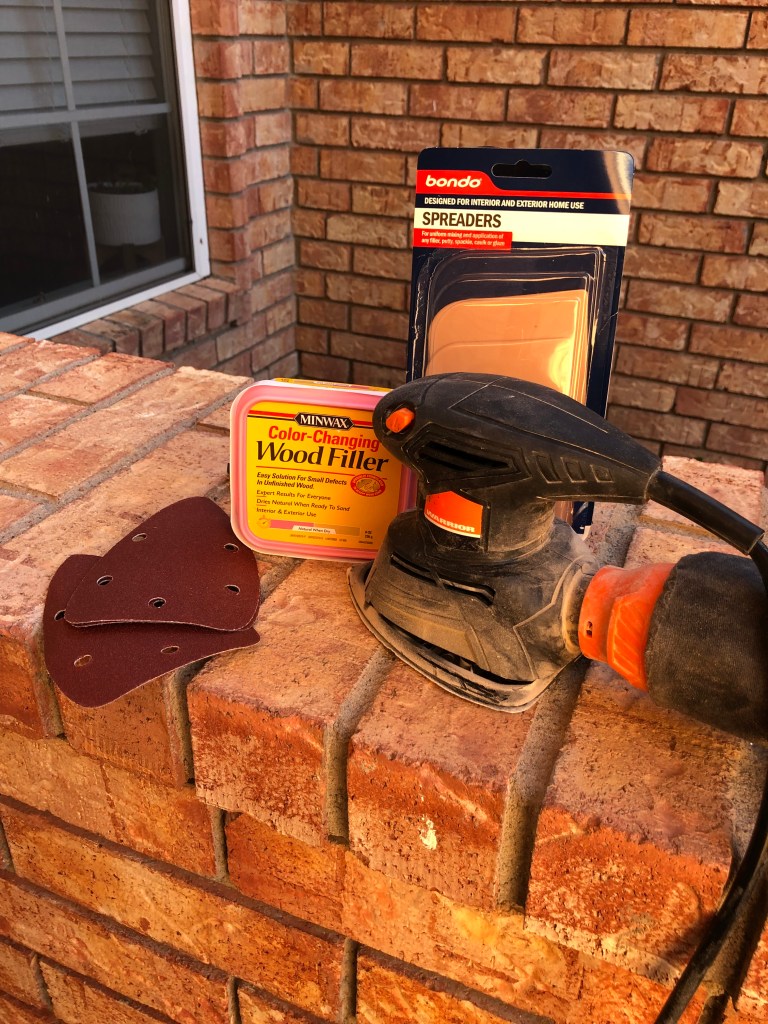
- Hand sander and sandpaper
- Paintable wood filler
- Bondo spreaders
- Gloves
- Dust cloth
- Staining sponge
** Its extremely important that you have a well-ventilated area!**
Step 1: Take the item you want to refinish and sand down the damaged area until smooth. Take the hand grinder (or you can hand sand) and lightly sand the surrounding area. (This is important so you irritate the polyurethane so the new coat of stain will adhere properly to the wood.)
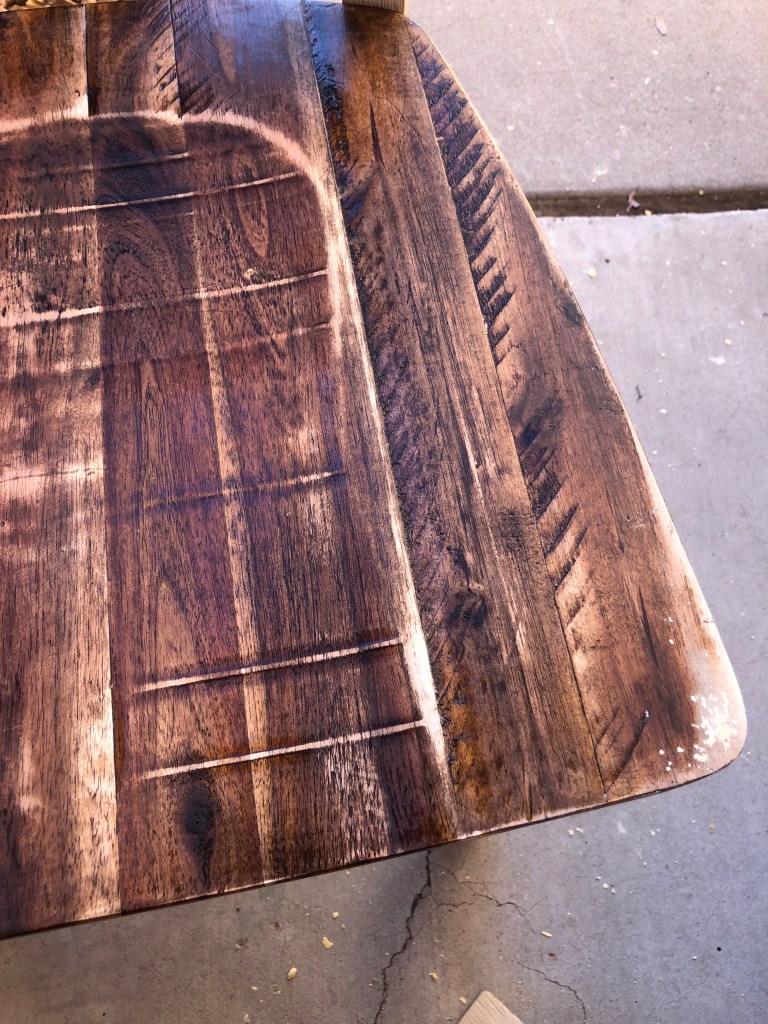
Step 2: Take a dust cloth and thoroughly wipe the entire area.
Step 3: Using a bondo spreader, spread the wood filler over the damaged area. You want to make sure it is thick enough for sanding and sculpting if needed in the upcoming steps. Make sure that the wood filler is complexly dry before moving to the next step. I like to use the color changing wood filler so I can visually tell that it is dry.

Step 4: After the wood filler is completely dry, take your hand sander and lightly sand over the patched area to create a smooth wood finish. You can also use a hand size piece of sand paper to hand sand if needed. After you are done sanding, ensure that you use a dust cloth to remove any additional dust from the item you are working on.
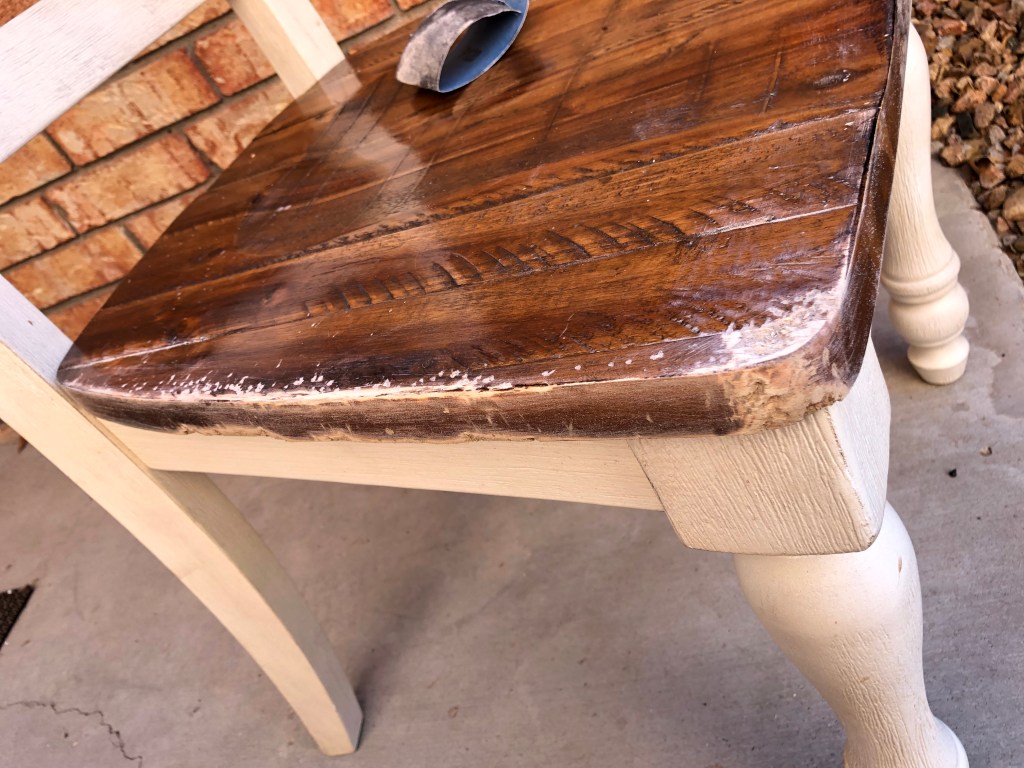
Step 5: After you have a clean, dust free surface, you can begin to stain the item. I like to use a staining pad, but you can use an old cut up cotton t-shirt or stain brush based on your preference.
Make sure that the stain is well mixed prior to opening the can. Using gloves, open the can and lightly dip the staining pad. You can rig it out with your finger tips allowing any excess to drip back into the can. Using the staining pad, lightly stain the patched area. Remember that you will want to dust the surrounding area with a light wipe of stain to blend it all together and to protect the wood from when you originally sanded the item. You can wipe away any dripping and heavy stain. Allow it to dry according to the stain manufacture instructions.
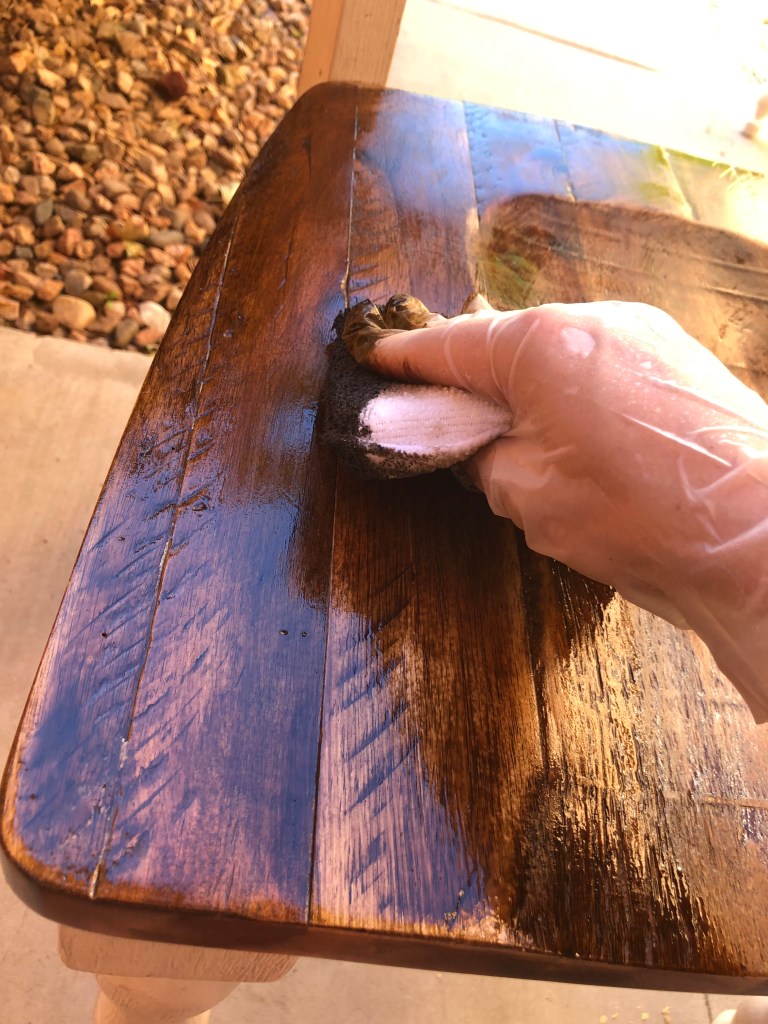
Step 6: After the stain is completely dry, take a scouring pad and lightly scuff up the area, and remove any dust particles with a dust rag. Continue step 5 again until you have reached the desired shade.
The outcome will surprise you! You can not even tell that there was any damage to the chairs, they still look brand new! No more puppy blues!